Staying up-to-date with all the various best practices related to accessibility, performance, and security, can be a challenge. And that’s where webhint can help.
Started by the Edge team, the tool was originally called “Sonar” when it was transitioned to the JS Foundation, and later it changed it’s name to “Sonarwhal.” Now it’s officially “webhint.”
Webhint offers both an online scanner and CLI for testing your site’s code for best practices and common errors, with the goal of helping you improve its accessibility, speed, and security.
Web Interface
In the most basic use case, you can go to webhint.io/scanner and enter the URL you want to analyze. After taking a few moments to review the URL, it will return the results of its tests.
By default, it will look at the three pillars of Accessibility, Security, and Performance, as well as Browser Interoperability and Progressive Web App-related items.
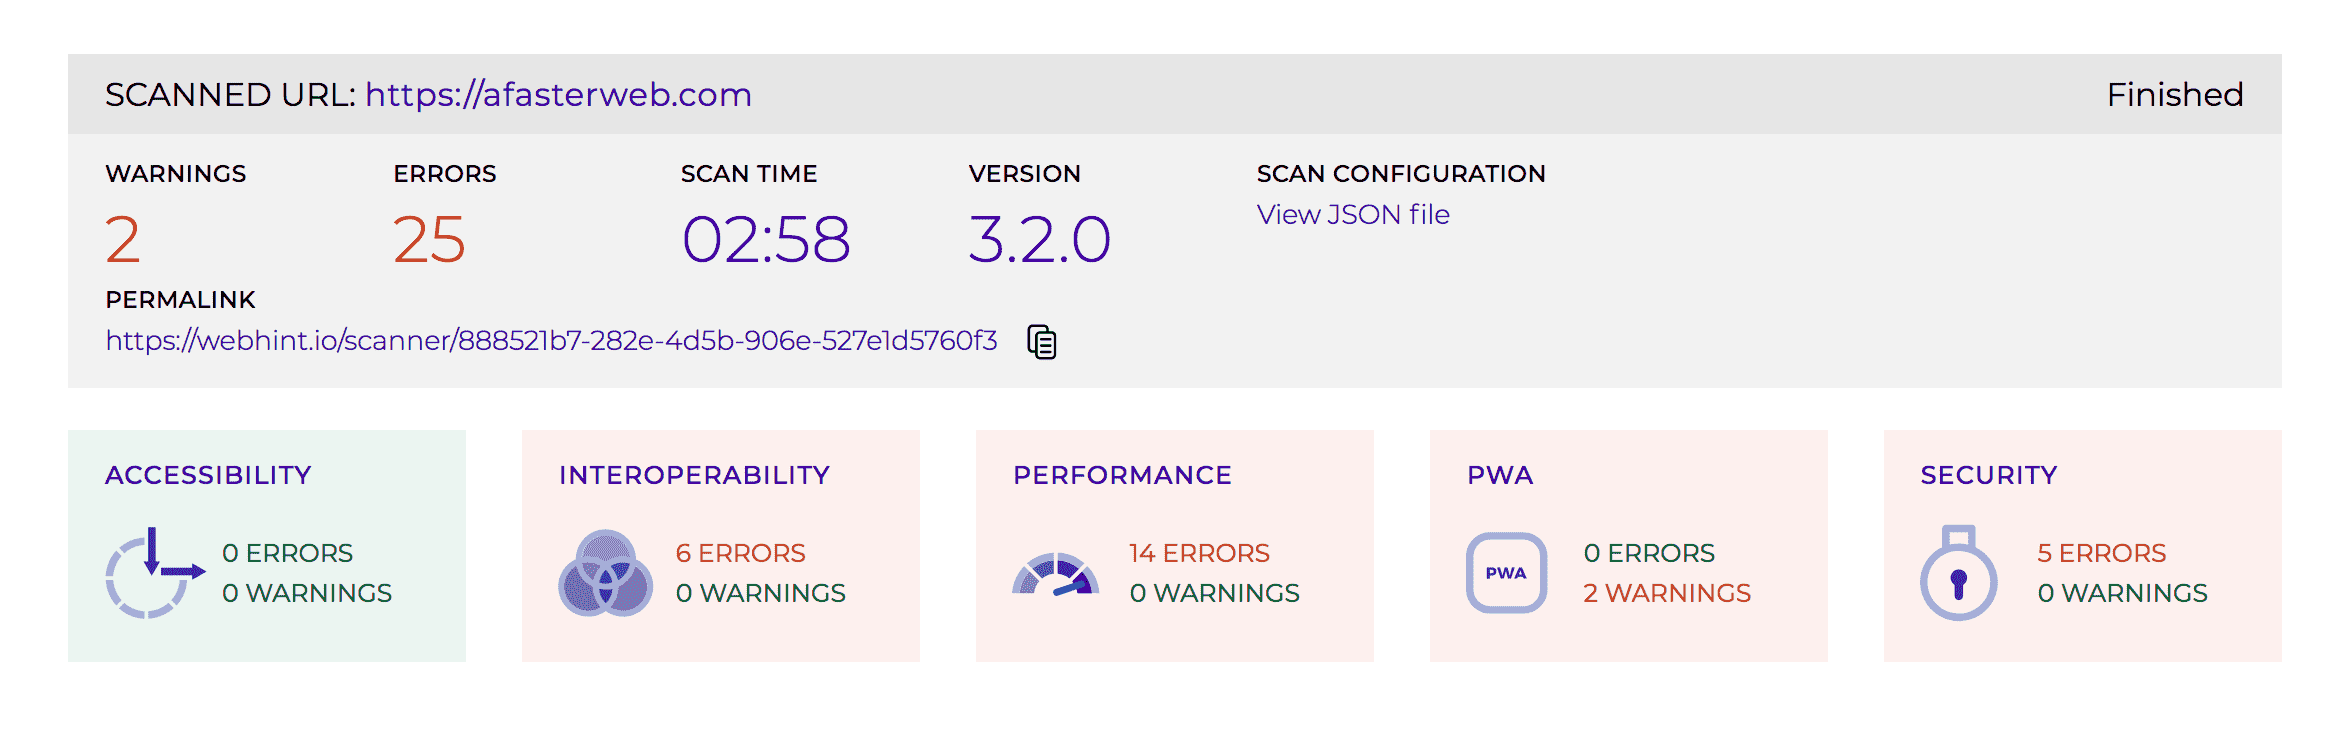
With each error or warning that it finds, it will give details of what it found, as well as documentation about that specific hint–why it’s important, how to fix any errors, and any configuration options.
CLI
The tool is not limited to just the web interface. You can also get the node version, and use its CLI. The package name is hint, and you can install it with:
$ npm install -g --engine-strict hint
(requires npm v5.2.0+ and Node LTS v8.9.2+)
Once installed, you can have it analyze a URL from the command line:
$ hint https://example.com
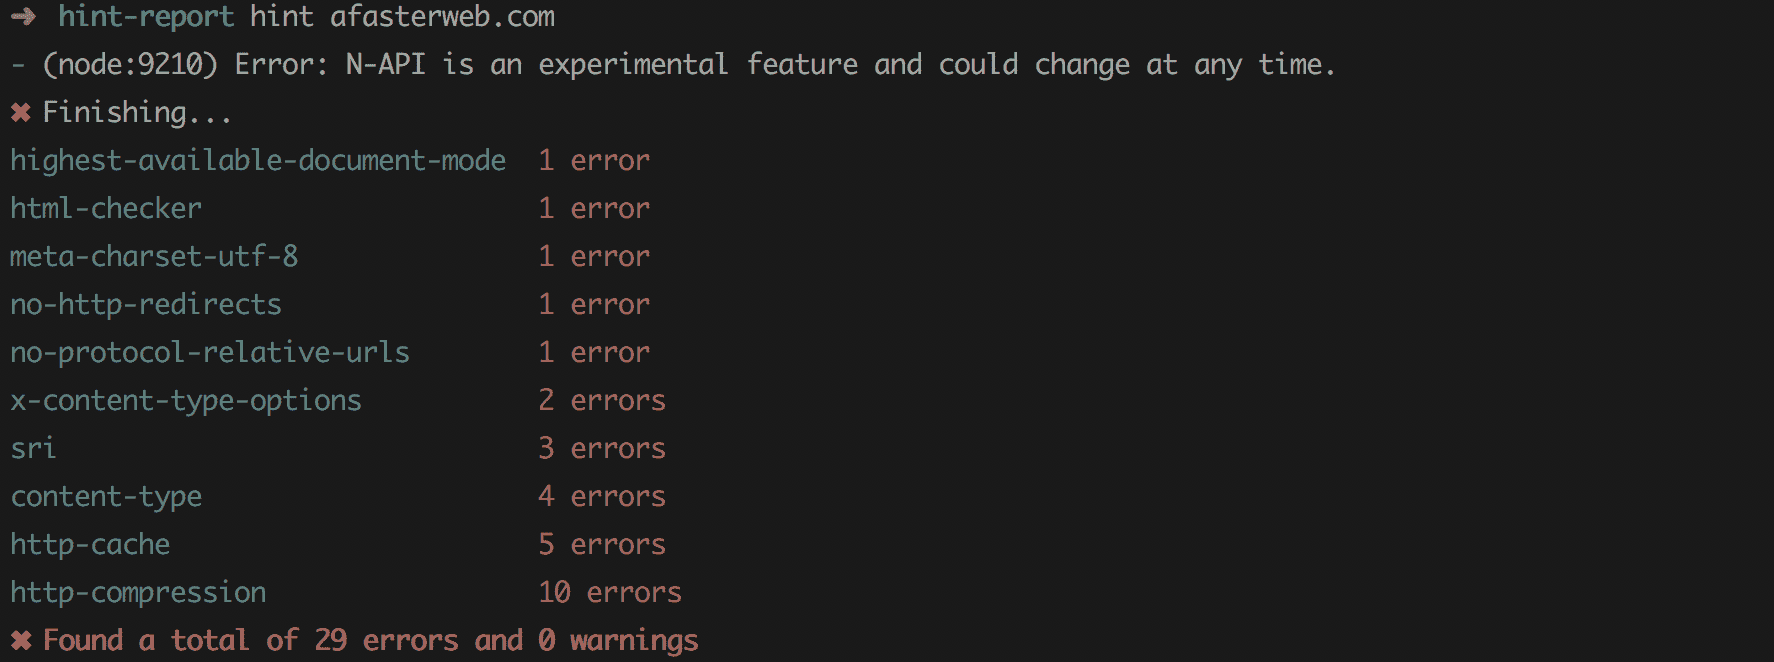
In addition to giving you an overview of the results, it will also create a report at ./hint_reports/__domain__. In that directory, there is an HTML version of the report, with additional information. This created report mimics what you would find at the online scanner.
Customization
Webhint comes with a default configuration, but it can also be configured using a .hintrc file. When hint is executed, it will check both the current directory, as well as the user’s home directory, for a configuation file. If it doesn’t find one, it will use the default configuration.
To create a custom configuration, you can use the following command to generate the necessary .hintrc file:
$ npm create hintrc
This will start a wizard which will ask you multiple questions in order to set up an appropriate base configuration. The user guide has documentation on how you can customize the resulting file to your needs.
Extensibility
In addition to customizing which hints to run, the tool will also allow you to create custom ‘hints,’ allowing you to extend it as needed. This desire to be extensible was something that was top-of-mind for the team working on it:
“Extensibility has always been in the top of our minds. There are many cases where a developer might want to create a custom hint and we want this to be as easy as possible. You can think of webhint not only as [a] tool for best practices, but also as an engine to create specific test for the things that matter in your development.”
Not only is the tool helpful out-of-the-box, providing plenty of hints for how to optimize a site, but the ability to extend it to meet the specific needs of our particular situation is a significant feature.
Links
For those interested in webhint, the best place to start is at webhint.io, where you can try out the online scanner and browse the documentation.
For more background on the tool, and how it fits into the current web ecosystem, here are two other articles you may enjoy:
- webhint: a hinting engine for the web, by Antón Molleda
- Webhint.io – hinting at a better web, by Christian Heilmann